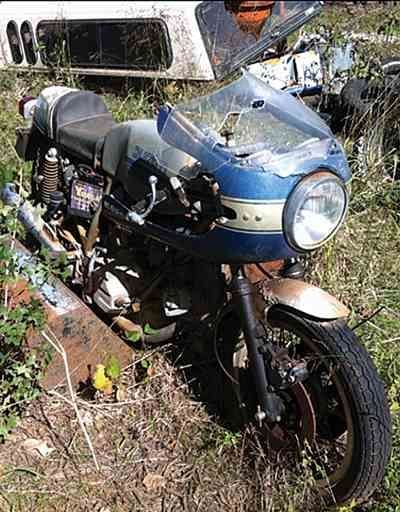
So, you want to restore a classic motorcycle—awesome choice. Whether it’s a dusty barn find, your dad’s old ride, or a swap meet mystery, taking an old bike and bringing it back to life is one of the most satisfying things a rider can do.
But let’s be real: it’s not all romantic sunset rides and polished chrome. No. Restoring a classic motorcycle is a rollercoaster of frustration, grease, eBay rabbit holes, and existential crises. And that’s exactly why we love it.
In this guide, I’ll walk you through how to restore a classic motorcycle—without smashing your tools or setting it on fire halfway through.
Why Restore a Classic Motorcycle in the First Place?
Because you’re not just fixing an old bike—you’re bringing history back to life.
You’re preserving something that was once the pride of someone’s garage, and turning it into a rolling piece of nostalgia.
You learn everything about your bike—every nut, bolt, and scratch.
You build something with your own two hands.
And when you finally start it for the first time… nothing beats that feeling.
Restoring a classic motorcycle isn’t about perfection—it’s about passion.
Step 1: Choose the Right Bike (or the Least Terrible One)
Before you grab the first rusty frame on Facebook Marketplace, do some homework. Some bikes are easier to restore than others, depending on parts availability, community support, and how many tears you’re willing to shed.
Great beginner-friendly classics to restore:
✔ Honda CB Series (CB350, CB750)
✔ Yamaha XS650
✔ BMW Airheads (R75/5, R80, etc.)
✔ Kawasaki KZ Series
✔ Royal Enfield Bullet (for a more relaxed project)
Want inspiration? Check out our deep dive into the Honda XL600 motorcycle, a classic dual-sport worth wrenching on here.
Avoid ultra-rare or exotic bikes (unless you’re rich or masochistic). Remember: cool is great, but running is better.
Step 2: Tear It Down (Yes, All the Way)
Take photos of everything before you touch a single bolt. You think you’ll remember where that spring goes? Spoiler: you won’t.
✔ Label every part
✔ Bag and box hardware
✔ Be patient—this step sets the tone for the whole build
This is when you’ll realize your “barn find” is actually held together by hope and spiderwebs. That’s okay. You’re about to fix it.
Step 3: Make a Plan (and a Budget… Then Double It)
Before you go full eBay warrior, make a plan:
– What’s your goal? Full original resto? Modern touches? Rat bike vibes?
– What’s your budget? (LOL, just double whatever number you think is realistic.)
– Make a parts list, check forums, and join Facebook groups.
Tip: Websites like CMSNL, BikeBandit, and RevZilla are gold mines for OEM and aftermarket parts.
Step 4: Frame, Engine, and Paint – The Big 3
This is where the magic happens—and where most people burn out.
Frame
Sandblast, inspect for cracks or damage, and either repaint or powder coat.
Engine
You don’t have to do a full rebuild, but at least:
✔ Replace seals & gaskets
✔ Clean the carbs
✔ Check compression
✔ Replace spark plugs and filters
Want a masterclass in legendary 2-stroke engines? Check out our post on the best 2-stroke motorcycle engines ever built here.
Paint
Whether you go DIY rattle can or pro-level paint job, a good finish makes everything feel fresh.
Step 5: Wiring – The Part Everyone Hates
Unless you’re a sadist or an electrician, wiring will drive you mad. But it’s crucial.
✔ Replace brittle old wires
✔ Use a clean, modern wiring harness if needed
✔ Upgrade to electronic ignition if possible (your future self will thank you)
Tip: Simplify. Strip it down to the basics—especially if you’re going for a café racer or scrambler build.
Step 6: The Details That Make It Yours
This is where your bike gets its personality. Think:
✔ Custom seat
✔ LED lights
✔ Aftermarket handlebars
✔ Period-correct tires
✔ Polished aluminum (if you have the patience of a monk)
You’re not just restoring a classic motorcycle—you’re building a machine that screams your style.
Step 7: The First Ride (and the Massive Grin That Comes With It)
You’ll hear that engine cough, sputter… and finally roar to life. And in that moment, every scraped knuckle, late night, and tool you threw across the garage was 100% worth it.
Take it slow. Check every bolt. Test everything twice.
Then… hit the road and let your masterpiece turn heads.
Final Thoughts: Why Restoring a Classic Motorcycle is Always Worth It
Yes, it’ll take time.
Yes, it’ll take money.
Yes, you’ll want to give up at least three times.
But in the end, you’ll have something truly special:
A motorcycle with soul, with history, and with your fingerprint on every piece of it.
And that’s something you can’t buy new.